LIFE AT THE COTTAGE

Tuesday, August 31, 2010

Tips and Tricks Tuesday #8 - How to Make a Yard Conservatory


Welcome to the eighth Tips & Tricks Tuesday linky party at the Brambleberry Cottage.


Diane @ Pittypat Paperie knew the party was still happenin' here, so she shared her tip for a festive recycle to celebrate.  Great job, Diane!

And now it's my turn to share a few tips and tricks.


I received so many wonderful e-mails and kind comments about my yard conservatory that I decided to give you a quick tutorial for its construction.


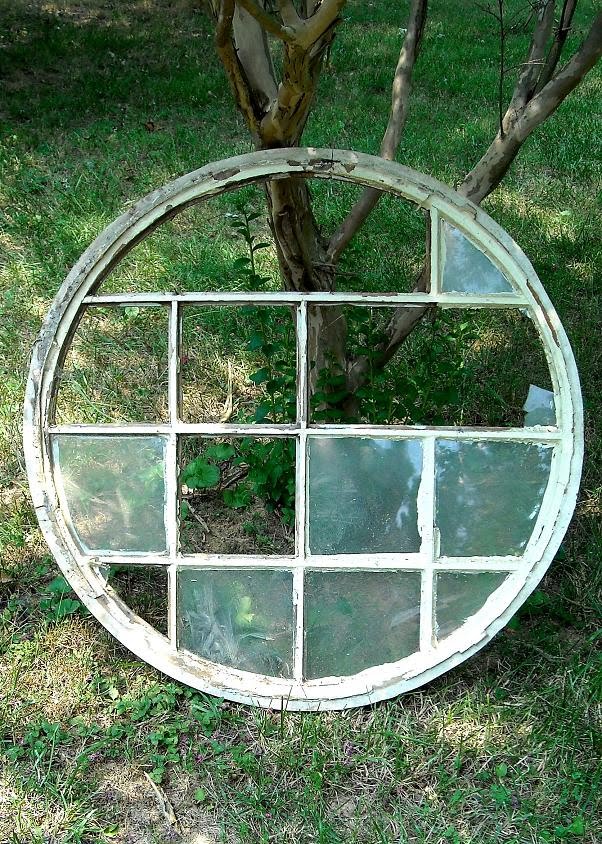
The windows you choose for your conservatory will dictate the shape it takes.

I knew before I started the shape I wanted.  Of course, having the advantage of a stash of vintage windows in my barn afforded me multiple options.

With the group of windows I selected, I could have built up, instead of out.  But, I knew before I began that I wanted my yard conservatory to resemble a cottage.

Here are a couple of tips:
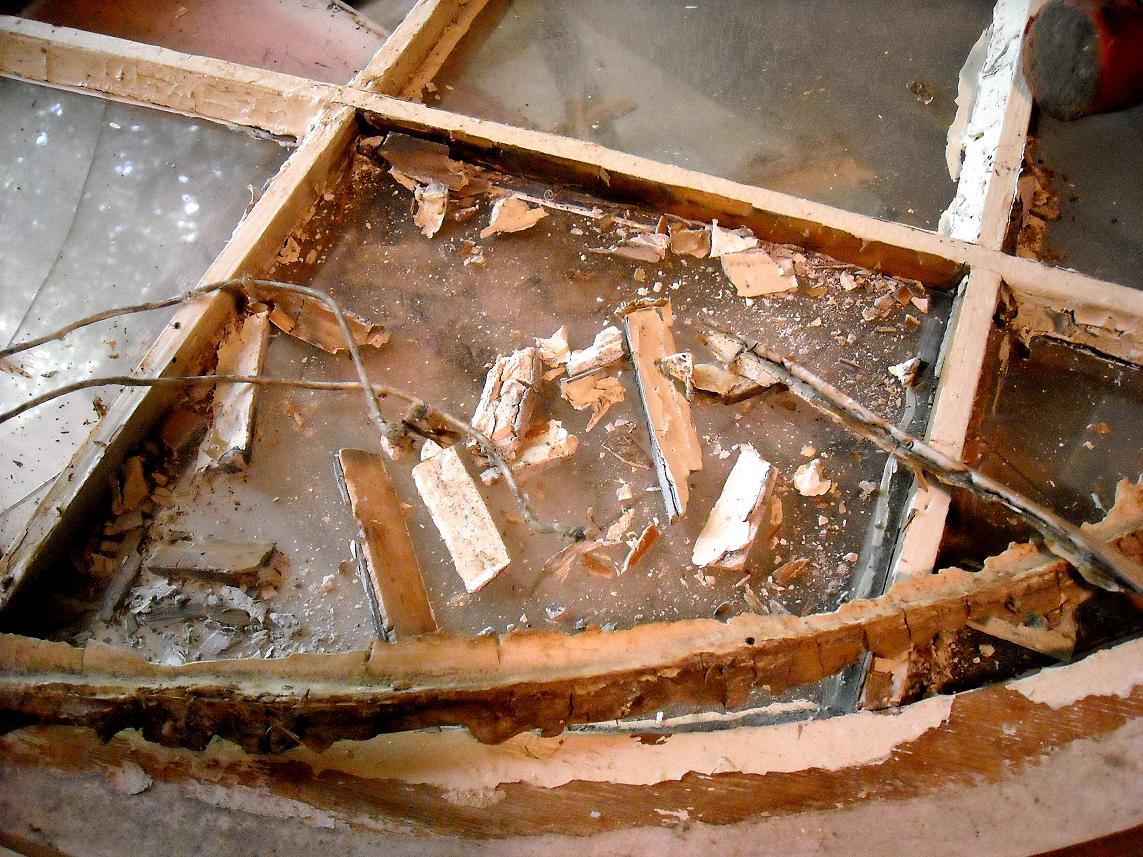
  Cleaning everything prior to assembly is much easier than after construction is complete.

And, if you intend to leave your conservatory outside, it's best to brush on a weather-resistant sealant like Thompson's WaterSeal.


Because I wanted my piece to have a very stable construction, a few more steps were taken than were absolutely necessary.  You'll have to decide if the extra effort is worth it to you.

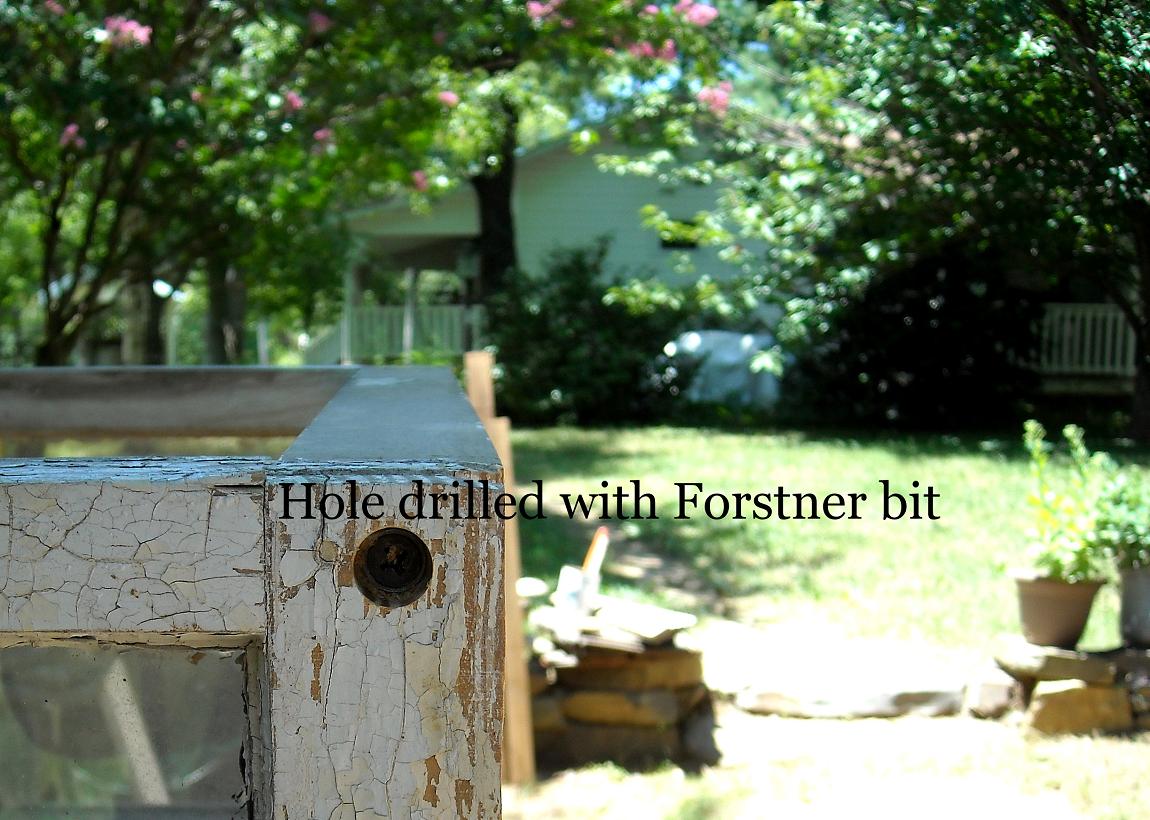
After all components were cleaned, dried, and sealed, a four-pane window was sandwiched between two six-pane windows. 


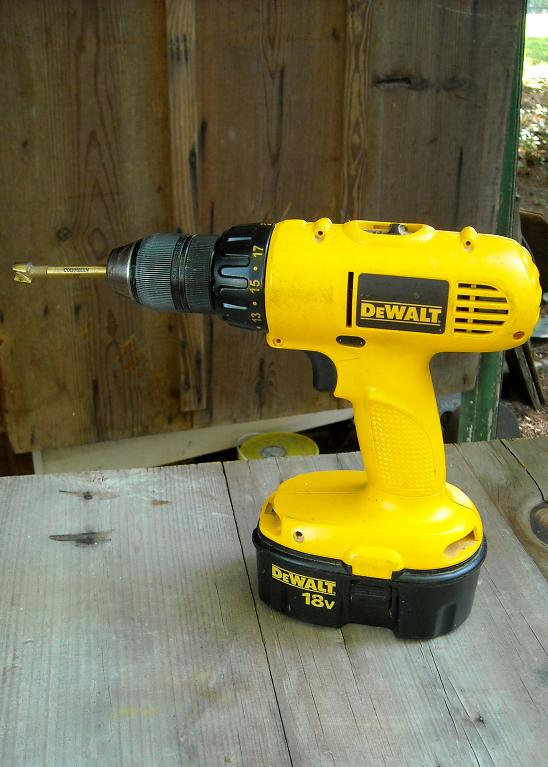
Rather than just nailing the three windows together, a 1/2" Forstner bit—on a cordless drill—was used to create holes for insetting screws. 

Two holes were made—top and bottom—on each side.  And 2 1/2" wood screws were used to join them all together.


If you take a close look at the image below, you'll observe that one of the four-pane windows was slightly taller than the other.  I could have left it that way, but decided to make them the same size. 


Again, it was purely a matter of preference.  You might have chosen to leave them different heights—and that would have worked, as well.


It was a breeze to cut the taller sash down with a circular saw.  To do so, just measure, use a carpenter's square to draw a straight line, and cut.


I also wanted the two windows for the top to rest flush on the sides.  So the circular saw was set at a 45 degree angle, and the part of each window that would be placed atop the sides was cut down.


Notice how cutting that angle into the top windows helped to close the gaps between the top and sides.


Before the two top windows were fastened on, they were aligned. 

This was accomplished by finding the exact midpoint on the front of the yard conservatory and clamping the carpenter's level so that the outer edge of it lined up perfectly with the midpoint.

Then the top windows were adjusted so that they touched exactly above the midpoint.  Now it was time to screw them in place.

Here's another tip:
  To prevent wood that you will be screwing into from splitting, always start a pilot hole with a drill and bit, first.  The bit should create a hole slightly smaller than the one that will be made by the screw.


Because I wanted a more finished look, and would be attaching a sheet of antique metal and a decorative piece of iron to the peak of the roof, a piece of wood was cut and screwed in at the center seam.

Not only did it help to stablize the top, it gave much needed support to the embellishments.

Finally, the four-pane window—the one trimmed down—was hinged to the front of the piece.


Several pieces of vintage beaded-board were ripped on the table saw, then cut to trim out all the exposed edges of the yard conservatory.


You can choose to leave yours open at the bottom, so that it will rest directly on the ground, or enclose it, and put it on legs—as I did. 

Want to see how I embellished mine?  Then jump over here.

As far as decorative elements are concerned, the sky's the limit.  The important thing is to have fun and make it uniquely yours!


I'm linking to Rory's Tools are for Women Too!

Monday, August 30, 2010

Ask the Yankee #7 - Answers to Your DIY Questions


BE SURE TO CHECK OUT ALL THREE NEW LINKY PARTIES HERE AT THE COTTAGE!


It's Monday night–a time to get those tough, challenging, oft-frustrating DIY questions answered by an expert.

If you've ever gotten stumped by a project and wished you had a go-to-guy for answers, this event is for you!

Here's the scoop for linking up:

Create a post on your blog addressing your DIY question and showing others where you're stuck in your project and need direction.
Link your post to the Ask the Yankee event with a direct link–not one to your main blog–and
link back to the Brambleberry Cottage.

Or...

Leave your question in the comment section of this Ask the Yankee post, and place the event button on your blog's sidebar.

Next week, a DIY question or two–along with their solutions–will be featured at the cottage.

Thursday, August 26, 2010

Talented Time Travelers in Focus #6


BE SURE TO CHECK OUT THE DETAILS FOR ALL THREE NEW LINKY PARTIES HERE AT THE COTTAGE!


Since I've been gone for five looong weeks, we're gonna have to take a trip way back in time to visit some of the wonderful projects from the last party participants.


We all love vintage silver, right?  Well, Nita @ Mod Vintage Life uses hers for storage–when it's not in service at the table.


Lori @ Paisley Passions shared an upscale update on an old cabinet door.


 Want to see a piece with presence from the past in the present?  Visit Susan @ Charm of the Carolines.


Do you have a doodler in the house?  Tere @ PonyTails And FishScales gave us a great tutorial that will make your little doodler all smiles.


And Melanie @ Southern Comfort in a Northern Life showed us how she transformed her home into a heavenly haven.

As always, great job, Time Travelers!

Happy 55th Anniversary, Mom & Dad!!!


Dad and Mom in Germany in 1956.

Inspiration

You two are an inspiration to the world.

Looking at you, we know that

soul mates can find and keep each other,

commitment means something,

a great team can overcome life’s troubles,

and love triumphs over all.

Happy Anniversary!
By Joanna Fuchs


At the beach on their honeymoon in 1955.

Thanks for setting such a wonderful example of enduring love for your family. 
I love you both very, very much!

Wednesday, August 25, 2010

Time Travel Thursday #7 - Vintage Window Transformation


"We all have our time machines. Some take us back, they're called memories.
Some take us forward, they're called dreams."
~Jeremy Irons~


Welcome to the seventh Time Travel Thursday linky party at the Brambleberry Cottage!
Are you ready to share your fondest memories, grandest dreams,
and most creative projects? Great!

Then let's do it!
 
Last night...


I took you through the steps I used to prepare an old window
for the latest cottage project.


Now tell the truth!
Have you grown weary of seeing this familiar scene? 
I sure hope not...because it will probably be quite some time before I
tire of using all that wonderful old beadboard we salvaged.

Of course, prior to the transformation, all the boards and the
window frame required a thorough cleaning, a few days of sun drying, 
and a good coat of Deft—to seal in
all that wonderful chippiness.


As I was laying out the configuration of the boards for the frame,
the Yankee asked if I had considered using metal anywhere in my design. 
I had not...but thought it was a great idea.


So...
out came some of our rusty, crusty vintage ceiling tins. 

We agreed that the larger rusted tin would add the best contrast
to the other materials being used.


We had found this antique leather pulley belt at our favorite junkin' spot
and had put it aside, not knowing when,
or how, we would use it. 

My brilliant Yankee came up with the perfect way
to incorporate it into my project.


The boards were cut and glued to the frame.  The corners of the ceiling tin
were cut and nailed in with decorative copper nails.  And the mirror
 was set in the special place created for it when
the muntins were rearranged. 

After the leather belt was scrubbed, rinsed, and thoroughly dried by the sun,
it was given a good coat of paste wax.  Strips of it were cut to frame in the
mirror.  Once again, the decorative copper nails came into play
 to attach the belt to the frame.

Then, more decorative nails were used to secure the part of the
pulley belt that encased the entire outside of the frame.


I love how this eighty-year-old window was
transformed into a one-of-a-kind mirror. 

How's that for a custom update?


I'll be linking this terrific transformation to Gina's Transformation Thursday,

Tuesday, August 24, 2010

Tips and Tricks Tuesday #7 - How to Prepare an Old Window Sash for Reuse


Welcome to the seventh Tips & Tricks Tuesday linky party
here at The Brambleberry Cottage!


Oh, my!  It's hard to believe it has been sooo long since we've partied together! 

Slowly, but surely, I'm climbing back in the blogging saddle.  So,
let's mosey on down the trail and revisit some of those terrific tips
shared by the last group of partygoers.


You just never know what the creative energies out in Blogland
will produce. 

For instance, Maryann @ Domestically Speaking found a way to construct
her own coral.  How ingenious is that?!


What do you do when you grow tired of a piece of furniture?  Toss it?
Jan @ Bobbypins Boardwalk devised a plan of reuse that's quite attractive.  
Go see for yourself!


Is there anything better than cheap?!  Yep...free
Kathy @ Having a Hallelujah Good Time transformed two chairs she got for free.  

To get the name of the organization where she made this score,
you'll need to visit Kathy for the details.


We all love to see something reinvented...right?  Can you envision this
piece in a flower garden?  Tootsie @ Tootsie Time could...and did. 
Go check out her masterful-repurpose project.


Patti @ On Hollyhock Farm found a way to turn this pretty salvage
item into something she could use every day.  Way to go, Patti!

Now..
it's my turn to share a Brambleberry Cottage tip.


This awesome round window was removed from a Children's Home
 that was built in the 1920s and that the Yankee helped remodel—over four years ago. 
It has been stored in one of our barns, until recently.

Each time I would notice it in the barn, I would ponder the possibilities
But, each idea I came up with seemed somewhat run-of-the-mill...
that is, until the week before we left for New England.


Once inspiration hit, I just had to pull that old gal out of the barn and
carry her into the workshop for a major overhaul. 

My normal course of action would have been to start with a good cleaning
But, for this project, there were a number of other
things that had to be done first.


I used a rubber mallet and a wood chisel to remove
years of built-up caulk and paint from the frame. 

Notice that the flat side of the chisel is against the wood.  I attempted to keep the chisel 
relatively flat on the surface, to ensure that the wood would not be gouged.


When it came time to remove the glazing, the flat side of the chisel was against the
wood muntins and the beveled side was against the caulk.  

Gentle taps from the rubber mallet was all that was necessary to loosen most of the caulk.  
However, some of it proved stubborn enough to require much harder hits.


Once all the caulk and glazing was removed, it was time to break out the glass. 

Though there are no pictures for this step, safety goggles and
heavy leather gloves were a must.


Next, I used a pair of needle-nose pliers to remove the glazing pins
and as many of the small nails as possible.


It was necessary to use the claw of a hammer for removing some nails, and others
could only be removed with the handy tool you see above.

For those not familiar with a Dremel, it is probably one of the most versatile
little tools you can own. 

Being a woman with small hands, I love how easy it is for me to hold
and use this handy-dandy item.


The project I envisioned for this sash required some reworking
of the existing muntins. 

In this image, you can see how things were beginning to take shape.

But, you'll have to come back tomorrow night—for
to see this project's reveal. 

You won't be disappointed!  I promise.

Monday, August 23, 2010

Ask the Yankee #6 - Answers to Your DIY Questions


BE SURE TO CHECK OUT ALL THREE NEW LINKY PARTIES HERE AT THE COTTAGE!


It's Monday night–a time to get those tough, challenging, oft-frustrating DIY questions answered by an expert.

If you've ever gotten stumped by a project and wished you had a go-to-guy for answers, this event is for you!

Here's the scoop for linking up:

Create a post on your blog addressing your DIY question and showing others where you're stuck in your project and need direction.


Link your post to the Ask the Yankee event with a direct link–not one to your main blog–and
link back to the Brambleberry Cottage.

Or...

Leave your question in the comment section of this Ask the Yankee post, and place the event button on your blog's sidebar.

Next week, a DIY question or two–along with their solutions–will be featured at the cottage.

Let's Have a Hoppin' Good Time


Tara of Graphic Design by Tara has so kindly honored me with this lovely award!  Wow!  Three awards back-to-back.  What do I say, except...THANK YOU, SO VERY MUCH!

As the award and her blog title states, Tara is a graphic designer.  She creates beautiful, and reasonably priced, one-of-a-kind blog banners and buttons.  You can check them out at her blog and her Etsy store.

She also invited me to participate in a blog hop...something I've never done.  A blog hop is a linky list that is shared on several blogs.  Feel free to join in the fun.  We'll have a hoppin' good time and make some new friends along the way!

Thursday, August 19, 2010

Be it Ever so Humble...


Well, the Yankee and I have finally found our way back to our humble little home! 

When we left around the middle of July–for the Brimfield Antiques and Collectibles Show–we estimated we'd be gone about two weeks–tops.  It's five weeks later, and we're just getting back. 

Did you miss me?  ; )

There are lots of fun things I want to share with you from my trip up north.  And you've actually already gotten a glimpse of some of the wonders of New England from the terrific old barns I showed you–during the Barn Chicks party.


Since I've received several e-mails, and a few comments, requesting a peek at the Brimfield show, I decided to make that the next thing on the agenda.


By now, you should know that when you see an image of festival tents in one of my posts, you're about to be shown some of the fabulous finds from the show I've done.

The area you see above was across the street from where I was set up.  There was something over there that really grabbed my attention. 

Can you guess what it might have been?


It was this amazing vintage pediment.  It kept calling to me until I finally paid it a visit.


And take a gander at these terrific architectural pieces that were right behind it!


As I walked a bit further down the street, I spotted this booth overflowing with the most incredible garden elements.


I was really quit smitten with this gorgeous fountain. 

But, I'm afraid it was a tad to grand for my little farmstead.


Without a doubt, this vendor had some of the most beautiful garden adornments I'd ever seen.


Walking around the various fields of vendors, I saw much of the same types of antiques and collectibles I see at every show I participate in.


But, I must say, this particular show also offered some rather unique–albeit quirky–items, as well.


For instance, this vendor had a tent full of oddities...
including these wax figures.

I truly like one-of-a-kind items, but these guys gave me the heebie-jeebies!


This is Erica...a real flesh and blood figure.  She was one of my friendly neighbors at the show.


I spent a lot of time ogling the sweet shabby pretties available in her tent.


She offered everything necessary to create an utterly romantic home décor.


This is Christina and Gallo...
two more of my wonderful neighbors from the show.


Their tent was totally packed with lovely, sophisticated pieces like those above and below.


Not only was I impressed with the beautiful, quality pieces they had for sale, but also with the fact that Gallo paints each of them himself.


Meet Tricia of the Red Door Antiques

She was set up in a different field than I was, but her tempting treasures lured me right to her tent, nonetheless.


The old chicken feeder-turned-dish rack she was selling was a little more befitting of a cottage farmhouse, wouldn't you agree?


And the cards in the back of Tricia's tent summed up one of the things I enjoy most about doing these shows–making "new" friends.

Indeed, we have made friends at each show we've participated in...including Brimfield.

But...
we also experienced another very special treat while there.


Numerous vendors had told us that Brimfield is a show known for bringing out many among the "who's who" crowd.

We didn't really expect to see anyone famous at the summer show, however.  Traditionally, that's the slowest of the three shows presented there during the year.


But...
See that little sticker?  Stickers, like that one, are placed on all the pieces purchased by...

 none other than...

Rachel Ashwell–the queen of Shabby Chic herself!

Yep.  That's right.  She visited our tent, and bought one of our pieces!

We were thrilled–considering the unbelievably large number of vendors she had to choose from.

We would have been excited just having her come into our tent.  But she actually liked our offerings enough to come inside...
and buy something!

Though I had created a lodge vignette (definitely not shabby chic) in a section of our space–using that table as the centerpiece–her keen decorator's eye homed right in on it. 

I'm not one to be starstruck.  But I must admit...
it sure was fun having someone famous buy one of our pieces!


I'll be sharing the pinks in these pics at Beverly's Pink Saturday.